프로젝트 포즈피커 개발 이야기입니다! 궁금하시다면 놀러와주세요 😃 [포즈피커 다운받기🔗] (opens new window)
# 들어가며
이 글은 RxTest기반의 테스트 코드 작성과 관련된 글입니다. 다음 글들을 먼저 읽고 오시면 아래에 이어질 글을 이해하는 데에 더 큰 도움이 됩니다.
- 유닛 테스트 환경 구축 (opens new window)
- RxBlocking, RxTest로 테스트코드 작성하기 (opens new window)
- 네트워크 목업 테스트 (opens new window)
필요한 사전지식
RxSwiftKingfisher- 유닛 테스트에 대한 이해
# 이미지 캐싱과 외부환경 의존성
테스트 코드 작성에 있어 가장 중요한 대전제는 외부 환경에 의존해서는 안된다는 것이다.
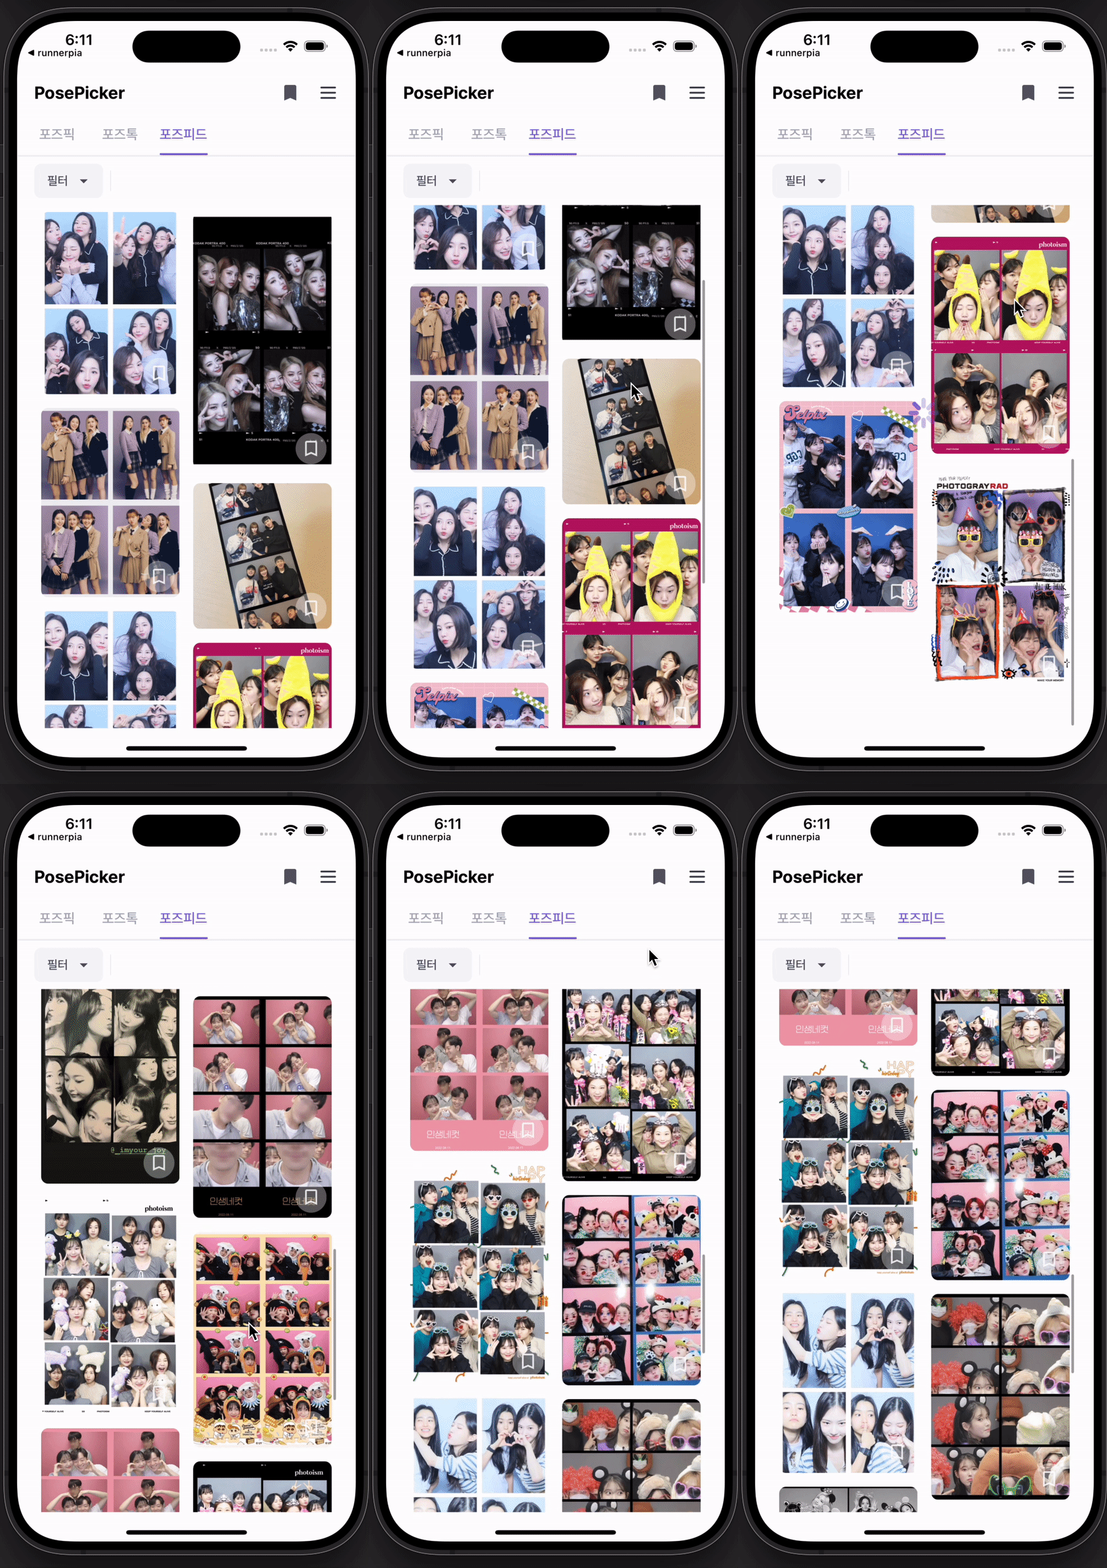
Kingfisher 라이브러리는 메모리에 이미지들을 캐싱하여 컬렉션뷰와 같이 빠른 속도로 컨텐츠 로딩이 필요한 뷰 구성에 많은 도움을 준다. 아래 화면을 잠깐 확인해보자.

위 화면을 구현하는 데에 작성된 코드 흐름은 다음과 같다.
- 포즈피드 메뉴 이동과 동시에 피드 초기 데이터 로딩 (API 요청)
- 스크롤이 끝에 닿았을때 다음 페이지 데이터 요청
이때 API 요청을 통해 불러온 JSON 데이터 일부를 보면 아래와 같다.
"content": [
    {
      "poseInfo": {
        "createdAt": "2023-09-24T20:07:07.44874",
        "updatedAt": "2023-09-24T23:27:53.504153",
        "imageKey": "https://AmazonS3 URL/이미지명.jpg",
        "poseId": 325,
      }
    },
    {
      "poseInfo": {
        "createdAt": "2023-09-24T20:09:52.465325",
        "updatedAt": "2023-09-24T20:09:52.465325",
        "imageKey": "https://AmazonS3 URL/이미지명.jpg",
        "poseId": 327,
      }
    },
    // ....
]
위의 데이터 속성값 중 imageKey가 아마존 S3에서 넘겨받은 이미지 URL이다. 이미지 데이터를 직접 넘겨주지 않고 위와 같이 이미지 URL을 클라이언트에 넘겨주면 직접 다운로드 받는 방식으로 구현하는 것이 일반적이다.
이때 이미지를 다운로드 한다는 점에서 클라이언트 자체 리소스를 사용한다는 부분이 중요하다. 컬렉션뷰 구성 시 스크롤이 되면서 기존 셀들을 재사용하는 형태로 내부가 구현되는데 기존 이미지를 초기화하면 동일한 셀 위치로 스크롤이 다시 이루어져 해당 셀을 표기하고자 할때 전에 다운로드 했던 이미지를 또 다시 다운로드 받아야 한다는 점이 큰 문제이다.
킹피셔 라이브러리는 이러한 문제를 쉽게 관리할 수 있게끔 캐시 CRUD에 대한 접근성을 쉽게 추상화 해두었다.
위 화면 구현에 사용된 코드의 일부를 보면 다음과 같다.
input.requestAllPoseTrigger
    .flatMapLatest { [unowned self] _ -> Observable<PoseFeed> in
        loadable.accept(true)
        return self.apiSession.requestSingle(.retrieveAllPoseFeed(pageNumber: self.currentPage, pageSize: 8)).asObservable()
    }
    .map { $0.content }
    .flatMapLatest { [unowned self] posefeed -> Observable<[PoseFeedPhotoCellViewModel]> in
        return self.retrieveCacheObservable(posefeed: posefeed) // 이미지 캐싱!
    }
    .subscribe(onNext: {
        loadable.accept(false)
        filterSection.accept($0)
    })
    .disposed(by: disposeBag)
viewDidLoad시점에 퍼블리시 서브젝트로requestAllPoseTrigger를 트리거 하여 API 요청을 진행한다.- 로드된 객체의
content속성에 접근하여 배열을 순회하며imageKey값을 기준으로 이미지 캐싱 로직을 실행한다. - 불러온 이미지를 기준으로 컬렉션뷰 셀 뷰모델을
BehaviorRelay객체에accept시켜 뷰 컨트롤러로 전달 및 바인딩을 진행한다.
이때 중간의 flatMapLatest 코드를 보면 retrieveCacheObservable이라는 함수를 호출하는 것을 볼 수 있다.
# retrieveCacheObservable 함수에 대한 이해
아래 함수는 직접 작성한 코드이다.
func retrieveCacheObservable(posefeed: [PosePick], isFilterSection: Bool = true) -> Observable<[CellViewModel]> {
    let viewModelObservable = BehaviorRelay<[CellViewModel]>(value: [])

    posefeed.forEach { posepick in
        ImageCache.default.retrieveImage(forKey: posepick.poseInfo.imageKey, options: nil) { [weak self] result in
            guard let self = self else { return }
            switch result {
            case .success(let value):
                if let image = value.image {
                    let viewModel = CellViewModel(image: image, poseId: posepick.poseInfo.poseId)
                    viewModelObservable.accept(viewModelObservable.value + [viewModel])
                } else {
                    guard let url = URL(string: posepick.poseInfo.imageKey) else { return }
                    KingfisherManager.shared.retrieveImage(with: url) { downloadResult in
                        switch downloadResult {
                        case .success(let downloadImage):
                            let viewModel = CellViewModel(image: downloadImage.image, poseId: posepick.poseInfo.poseId)
                            viewModelObservable.accept(viewModelObservable.value + [viewModel])
                        case .failure:
                            return
                        }
                    }
                }
            case .failure:
                return
            }
        }
    }
    return viewModelObservable.asObservable().skip(while: { $0.count < posefeed.count })
}
함수 파라미터로 [PosePick] 타입의 데이터를 전달받는데, 위의 JSON 예시 데이터에서 content 키값에 대한 밸류값이 [PosePick]에 해당한다. 이 값을 forEach로 순회하며 imageKey값을 추출하여 킹피셔의 이미지 캐싱 로직을 호출하게 된다.
셀 뷰모델 배열을 생성하여 리턴하는 이유에 대해서는 Input & Output & transform에 대한 이해가 필요하다. 자세한 내용은 다음 글을 (opens new window) 참고하자.
중요한 viewModelObservable에 셀 뷰모델을 accept하는 등의 내용은 미뤄두고, 킹피셔 로직 자체에만 집중해보자.
- 초기에 킹피셔 캐시 저장소의
ImageCache.default객체의retrieveImage(forKey: )파라미터를 통해 이미지 URL 기준으로 캐시에 이미지가 저장되어 있는지 여부를 체크한다. - 이미지 URL을 키값으로 하여 이미지가 이미 캐싱되어 있었다면 그대로 이미지를 객체화하여 로드한다.
- 이미지가 캐싱되어 있지 않았다면
KingfisherManager.shared.retrieveImage(with: url)메서드를 호출하여 이미지를 직접 다운로드한다. - 다운로드된 이미지 객체는 해당 URL을 기준으로 자동으로 캐싱된다.
이때 3~4번으로 이어지는 과정이 바로 네트워크라는 외부 환경에 종속되는 문제가 있다. 캐싱된 이미지에 접근하는 경우 메모리 내부 상황이 역시나 매번 동일한 상황이 아니기에 이에 대한 독립성 보장도 필요한데, 이는 매 테스트 셋업 단계에서 캐시를 비워줌으로써 네트워크를 통한 이미지 설치 로직만 거쳐가도록 강제하는 방법으로 우선 구현해두었다.
# 킹피셔 options 둘러보기
테스트 코드 작성을 위해 필요한 목업 네트워킹은 다음과 같다.
- 북마크 컨텐츠들에 대한 정보를 갖는 JSON 파일 요청
- 1번에서 획득한 JSON 내에서 이미지 URL을 추출하여 이미지 데이터 다운로드
이때 1번 과정은 이전 글에서 작성한 MockURLProtocol을 통해 직접 작성한 로컬의 JSON 파일을 디코딩하는 것으로 해결하였다.
테스트 코드를 작성할때 한 가지 유념해야 한다고 생각한 것은 테스트 대상이 현재 자신이 테스트 여부인지를 인지하면 안된다는 것이다. 코드를 이러한 방향성으로 작성하게 되면 let isTest: Bool과 같이 테스트 여부를 상태값으로 추가하여 관리하게 되고, 이에 따라 동일한 뷰모델 혹은 뷰컨트롤러 내에서 복잡성을 가지고 코드를 작성하게 된다.
따라서 최대한으로 테스트 여부를 판단할 수 있는 마지노선을 테스트 대상 객체가 생성되는 시점에 특정 객체를 주입하는 것 이상으로 코드의 변경이 내부적으로 이루어지면 안된다. 예컨대 목업 URL 프로토콜을 사용할때 뷰모델에 목업 프로토콜 클래스가 지정된 세션 객체를 주입해주는 것 외에 뷰모델 클래스 내부 변경사항이 있지는 않았다.
이러한 점에서 출발하여, 2번 과정에서 이미지 URL 추출 후 직접 다운로드하는 과정을 테스트코드로 작성할 때에 현재 뷰모델이 테스트 여부인지 상태값을 추가하여 코드를 작성하면 retrieveCacheObservable 함수에서 가짜 객체를 리턴하는 방식으로 코드 작성이 가능은 하지만 사실상의 테스트 코드 작성의 의미가 많이 퇴색된다는 것을 알 수 있다.
위 문제를 해결하기 위한 사고의 흐름은 다음과 같았다.
setUp라이프사이클에서 캐시 저장소를 완전히 비운다.- 1번 과정에 따라 목업 네트워킹을 통해 전달받은 JSON 디코딩 객체의 이미지 URL을 키값으로 할때 이에 대응되는 밸류의 이미지 객체는 존재하지 않는 상태이다.
- 모든 이미지 URL은 네트워킹을 통해 다운로드를 진행해야 한다.
- 킹피셔 라이브러리 내에 목업 프로토콜을 주입하여 이미지가 실제 다운로드 된것 처럼 할 수 있나?
4번 과정에 테스트 코드 작성에 핵심이 되는 부분이었는데, 결국 킹피셔에서도 URL 객체를 통한 이미지 다운로드 과정도 코드 추상화 단계를 넘어 로우한 단계로 넘어가게 되면 JSON 데이터를 요청하는 것과 유사한 방법으로 로컬 내에 등록된 가짜 이미지를 넘겨주는 방식으로 동작하도록 만들 수 있었다는 것이다.
위의 retrieveCacheObservable 함수를 보면 imageKey값을 기준으로 캐시에 이미지 데이터가 존재하지 않는 경우 URL 객체를 생성하여 네트워크 요청으로 넘어가는 단계가 있다.
guard let url = URL(string: posepick.poseInfo.imageKey) else { return }
KingfisherManager.shared.retrieveImage(with: url) { downloadResult in
    switch downloadResult {
    case .success(let downloadImage):
        let viewModel = CellViewModel(image: downloadImage.image, poseId: posepick.poseInfo.poseId)
        viewModelObservable.accept(viewModelObservable.value + [viewModel])
    case .failure:
        return
    }
}
이때 KingfisherManager.shared.retrieveImage 메서드에 다양한 파라미터를 활용할 수 있는데, 그 중 options 파라미터 타입을 살펴보자. 파라미터 타입은 KingfisherOptionsInfoItem인데 내부에 상당히 많은 옵션들이 열거형으로 지정되어 있는 것을 볼 수 있다. 그 중 우리가 살펴볼 케이스는 downloader 케이스이다.
public enum KingfisherOptionsInfoItem {

    /// Kingfisher will use the associated `ImageCache` object when handling related operations,
    /// including trying to retrieve the cached images and store the downloaded image to it.
    case targetCache(ImageCache)

    /// The `ImageCache` for storing and retrieving original images. If `originalCache` is
    /// contained in the options, it will be preferred for storing and retrieving original images.
    /// If there is no `.originalCache` in the options, `.targetCache` will be used to store original images.
    ///
    /// When using KingfisherManager to download and store an image, if `cacheOriginalImage` is
    /// applied in the option, the original image will be stored to this `originalCache`. At the
    /// same time, if a requested final image (with processor applied) cannot be found in `targetCache`,
    /// Kingfisher will try to search the original image to check whether it is already there. If found,
    /// it will be used and applied with the given processor. It is an optimization for not downloading
    /// the same image for multiple times.
    case originalCache(ImageCache)

    /// Kingfisher will use the associated `ImageDownloader` object to download the requested images.
    case downloader(ImageDownloader)

    /// ....
    /// ....
}
다운로더 옵션의 설명을 보면 Kingfisher will use the associated ImageDownloader object to download the requested images.라고 되어 있다. 요청하는 이미지에 대해 다운로드를 연관값으로 지정된 ImageDownloader 객체를 통해 지정하겠다는 의미이다.
ImageDownloader 객체를 살펴보면 또한 동일하게 내부적으로 다양한 속성들이 존재한다.
open class ImageDownloader {

    // MARK: Singleton
    /// The default downloader.
    public static let `default` = ImageDownloader(name: "default")

    // MARK: Public Properties
    /// The duration before the downloading is timeout. Default is 15 seconds.
    open var downloadTimeout: TimeInterval = 15.0

    /// A set of trusted hosts when receiving server trust challenges. A challenge with host name contained in this
    /// set will be ignored. You can use this set to specify the self-signed site. It only will be used if you don't
    /// specify the `authenticationChallengeResponder`.
    ///
    /// If `authenticationChallengeResponder` is set, this property will be ignored and the implementation of
    /// `authenticationChallengeResponder` will be used instead.
    open var trustedHosts: Set<String>?

    /// Use this to set supply a configuration for the downloader. By default,
    /// NSURLSessionConfiguration.ephemeralSessionConfiguration() will be used.
    ///
    /// You could change the configuration before a downloading task starts.
    /// A configuration without persistent storage for caches is requested for downloader working correctly.
    open var sessionConfiguration = URLSessionConfiguration.ephemeral {
        didSet {
            session.invalidateAndCancel()
            session = URLSession(configuration: sessionConfiguration, delegate: sessionDelegate, delegateQueue: nil)
        }
    }

    /// ...
    /// ...
}
이중 눈여겨 볼 부분은 바로 sessionConfiguration이다. You could change the configuration before a downloading task starts.라는 설명으로 미루어 보아 이미지 객체 다운로드를 진행하기 전 세션 객체를 직접 주입해줄 수 있음을 알 수 있다.
JSON 데이터를 주고받을때 요청을 시작하기 전 세션 객체의 Configuration 속성에 접근한 뒤 protocolClasses를 목업 프로토콜로 지정해줬던 것과 마찬가지로 테스트코드 셋업 단계에서 ImageDownloader 객체를 생성하되 protocolClasses를 이미지 URL을 기준으로 목업 데이터를 뿌려주는 프로토콜로 지정하면 되는 것이다.
이러한 논리 구조를 기반으로 하여 작성한 목업 이미지 다운로드 프로토콜은 다음과 같다.
MockImageDownloaderIURLProtocol 코드 전문 펼쳐보기
import Foundation

final class MockImageDownloaderIURLProtocol: URLProtocol {

    private lazy var session: URLSession = {
        let configuration: URLSessionConfiguration = URLSessionConfiguration.default
        return URLSession(configuration: configuration)
    }()

    enum ResponseType {
        case error(APIError)
        case success(HTTPURLResponse)
    }

    static var responseType: ResponseType!
    static var dtoType: MockDTOType!
}

extension MockImageDownloaderIURLProtocol {

    static func responseWithFailure() {
        MockImageDownloaderIURLProtocol.responseType = MockImageDownloaderIURLProtocol.ResponseType.error(APIError.unknown)
    }

    static func responseWithStatusCode(code: Int) {
        MockImageDownloaderIURLProtocol.responseType = MockImageDownloaderIURLProtocol.ResponseType.success(HTTPURLResponse(url: URL(string: K.baseUrl)!, statusCode: code, httpVersion: nil, headerFields: nil)!)
    }

    static func responseWithDTO(type: MockDTOType) {
        MockImageDownloaderIURLProtocol.dtoType = type
    }
}


extension MockImageDownloaderIURLProtocol {

    enum MockDTOType {
        case empty
        case cacheImage

        var fileName: String {
            switch self {
            case .empty: return ""
            case .cacheImage: return "image.jpeg"
            }
        }
    }

    override class func canInit(with request: URLRequest) -> Bool {
        return true
    }

    override class func canonicalRequest(for request: URLRequest) -> URLRequest {
        return request
    }

    override func startLoading() {
        let response = setUpMockResponse()
        let data = setUpMockData()

        client?.urlProtocol(self, didReceive: response!, cacheStoragePolicy: .notAllowed)

        client?.urlProtocol(self, didLoad: data!)

        self.client?.urlProtocolDidFinishLoading(self)
    }

    private func setUpMockResponse() -> HTTPURLResponse? {
        var response: HTTPURLResponse?
        switch MockImageDownloaderIURLProtocol.responseType {
        case .error(let error)?:
            client?.urlProtocol(self, didFailWithError: error)
        case .success(let newResponse)?:
            response = newResponse
        default:
            fatalError("No fake responses found.")
        }
        return response!
    }

    private func setUpMockData() -> Data? {
        let fileName: String = MockImageDownloaderIURLProtocol.dtoType.fileName
       // 번들에 있는 json 파일로 Data 객체를 뽑아내는 과정.
        guard let file = Bundle.main.url(forResource: fileName, withExtension: nil) else {
            return Data()
        }
        return try? Data(contentsOf: file)
    }

    override func stopLoading() {
    }
}
MockDTOType 열거형 변경 외에는 기존 코드에서 달라지는 점은 없다.
목업 프로토콜을 각각 지정한 이유?
이미지 다운로드 목업 네트워크 프로토콜과 일반 네트워크 통신 목업 프로토콜을 각자 지정한 이유는 동일한 테스트 케이스에서 서로 다른 네트워크 요청이 병렬적으로 이루어지기 때문이다. 테스트 코드 작성시 responseWithDTO, responseWithStatusCode를 통해 가짜 응답에 대한 정의를 미리 결정해두고 시작하는데 이러한 부분이 타입 속성(static property)을 기반으로 이루어지기 때문에 하나의 네트워크 요청에 대해 responseWithStatusCode값은 동일할 수 있어도 responseWithDTO는 달라질 수 있다.
# 테스트 코드 작성
작성한 테스트 코드를 살펴보자. setUp부터 보면 다음과 같이 코드를 작성할 수 있다.
final class bookmarkTests: XCTestCase {
    var disposeBag: DisposeBag!
    var sut: APISession!
    var scheduler: TestScheduler!
    var viewModel: BookMarkViewModel!

    override func setUp() {
        super.setUp()
        let session: Session = {
            let configuration: URLSessionConfiguration = {
                let configuration = URLSessionConfiguration.default
                configuration.protocolClasses = [MockURLProtocol.self]
                return configuration
            }()
            return Session(configuration: configuration)
        }()

        let imageDownloader: ImageDownloader = {
            let downloader = ImageDownloader.default
            let configuration = URLSessionConfiguration.default
            configuration.protocolClasses = [MockImageDownloaderIURLProtocol.self]
            downloader.sessionConfiguration = configuration
            return downloader
        }()

        sut = APISession(session: session)
        disposeBag = DisposeBag()
        scheduler = TestScheduler(initialClock: 0)
        viewModel = BookMarkViewModel(apiSession: sut, imageDownloader: imageDownloader) // 목업 세션 주입
        ImageCache.default.clearCache() // 캐시 비우기
    }
}
중간의 ImageDownloader 객체를 생성하는 과정에서 세션 configuration 속성에 접근하여 목업 이미지 다운로드 프로토콜을 직접 지정해주는 부분을 볼 수 있다. 이후 뷰모델 객체 생성시 다운로더 객체를 주입해줌으로써 뷰모델에서 retrieveCacheObservable을 호출할때 자신 객체의 다운로더 객체를 참조하면 외부에서 다운로더가 주입된 상태일때는 해당 객체를 사용하고, 그렇지 않은 경우 킹피셔의 디폴트 다운로더를 사용하게 되는 것이다.
뷰모델 클래스의 이니셜라이저를 잠깐 살펴보고 다시 오자.
class BookMarkViewModel {

    var apiSession: APISession
    var disposeBag = DisposeBag()
    var imageDownloader: ImageDownloader

    init(apiSession: APISession = APISession(), imageDownloader: ImageDownloader = ImageDownloader.default) {
        self.apiSession = apiSession
        self.imageDownloader = imageDownloader
    }

    // ...
}
위 코드를 보면 이니셜라이저에 디폴트값으로 ImageDownloader.default값을 두고 속성값을 초기화해주는 것을 볼 수 있다.
다시 테스트코드로 넘어와서, setUp이후 본격적인 테스트 코드를 작성해보자.
func test_데이터가_없을때_empty뷰를_띄워주는지() {

    MockURLProtocol.responseWithStatusCode(code: 200)
    MockURLProtocol.responseWithDTO(type: .bookmarkFeed)

    MockImageDownloaderIURLProtocol.responseWithStatusCode(code: 200)
    MockImageDownloaderIURLProtocol.responseWithDTO(type: .cacheImage)

    var input = retrieveDefaultInputObservable()

    input.viewDidLoadTrigger = scheduler.createColdObservable([
        .next(1, ())
    ]).asObservable()

    let output = viewModel.transform(input: input)
    let expectation = XCTestExpectation(description: "북마크 API 테스트")

    scheduler.start()

    // 네트워크에 의존중..
    output.bookmarkItems
        .compactMap { $0 }
        .drive(onNext: {
            $0.forEach { element in
                print(element.image.value)
                print(element.poseId.value)
            }
            expectation.fulfill()
        })
        .disposed(by: disposeBag)

    wait(for: [expectation], timeout: 5)
}
- JSON 데이터 요청과 더불어 이미지 다운로드 목업 프로토콜에 대한 응답 형태를 지정한다.
- 인풋 객체를 얻고 스케줄러를 통해 트리거 옵저버블을 동작시킨다.
- 아웃풋 transform 객체 및
XCTestExpectation객체를 정의한다. - 스케줄러를 시작한다.
- 뷰모델 내에서 정의된 인풋 트랜스폼 로직에 따라 아웃풋 객체들을 얻어낸다.
- 통신을 마치고
fulfill호출을 통해 테스트를 마친다.
위의 output.bookmarkItems 코드에 대한 이해를 위해 잠시 뷰모델 transform 함수로 다시 이동해보자.
func transform(input: Input) -> Output {
    let bookmarkItems = BehaviorRelay<[BookmarkFeedCellViewModel]?>(value: nil)

    /// 1. 뷰 로드 이후 컬렉션뷰 셀 아이템 API 요청
    input.viewDidLoadTrigger
        .flatMapLatest { [unowned self] _ -> Observable<PoseFeed> in
            return apiSession.requestSingle(.retrieveBookmarkFeed(userId: 0, pageNumber: 0, pageSize: 8)).asObservable()
        }
        .map { $0.content }
        .flatMapLatest { [unowned self] posefeed -> Observable<[BookmarkFeedCellViewModel]> in
            return retrieveCacheObservable(posefeed: posefeed)
        }
        .subscribe(onNext: {
            bookmarkItems.accept($0)
        })
        .disposed(by: disposeBag)

    return Output(bookmarkItems: bookmarkItems.asDriver())
}
컬렉션뷰 셀에 바인딩할 셀 뷰모델 객체들을 찍어내는 과정인데, 인풋 트리거 이후 requestSingle에서 1차적으로 목업 프로토콜 기반으로 네트워크 통신이 이루어지고 retrieveCacheObservable에서 이미지 downloadTask에 이미지 다운로드 목업 프로토콜 기반으로 네트워크 통신이 이루어진다.
이때 호출되는 retrieveCacheObservable 함수를 다시 살펴보면 다음과 같다. 우선 뷰모델 내에서 이니셜라이저를 통해 ImageDownloader 객체를 정의해두었음을 기억하고 아래 코드를 살펴보자.
func retrieveCacheObservable(posefeed: [PosePick]) -> Observable<[CellViewModel]> {

    let viewModelObservable = BehaviorRelay<[CellViewModel]>(value: [])

    posefeed.forEach { posepick in
        ImageCache.default.retrieveImage(forKey: posepick.poseInfo.imageKey, options: nil) { [weak self] result in
            guard let self = self else { return }
            switch result {
            case .success(let value):
                if let image = value.image {
                    let viewModel = CellViewModel(image: image, poseId: posepick.poseInfo.poseId)
                    viewModelObservable.accept(viewModelObservable.value + [viewModel])
                } else {
                    guard let url = URL(string: posepick.poseInfo.imageKey) else { return }

                    // 주입된 이미지 다운로더를 전달!
                    KingfisherManager.shared.retrieveImage(with: url, options: [.downloader(self.imageDownloader)]) { downloadResult in
                        switch downloadResult {
                        case .success(let downloadImage):
                            let viewModel = CellViewModel(image: downloadImage.image, poseId: posepick.poseInfo.poseId)
                            viewModelObservable.accept(viewModelObservable.value + [viewModel])
                        case .failure:
                            return
                        }
                    }
                }
            case .failure:
                return
            }
        }
    }
    return viewModelObservable.asObservable().skip(while: { $0.count < posefeed.count })
}
중간에 보면 KingfisherManager.shared.retrieveImage(with: url, options: [.downloader(self.imageDownloader)]) 코드가 작성된 것을 볼 수 있다.
뷰모델에 주입된 이미지 다운로더 객체를 옵션에 전달함으로써 목업 프로토콜로 세팅된 다운로드를 진행할 수 있게 되는 것이다.
# 테스트 실행 결과
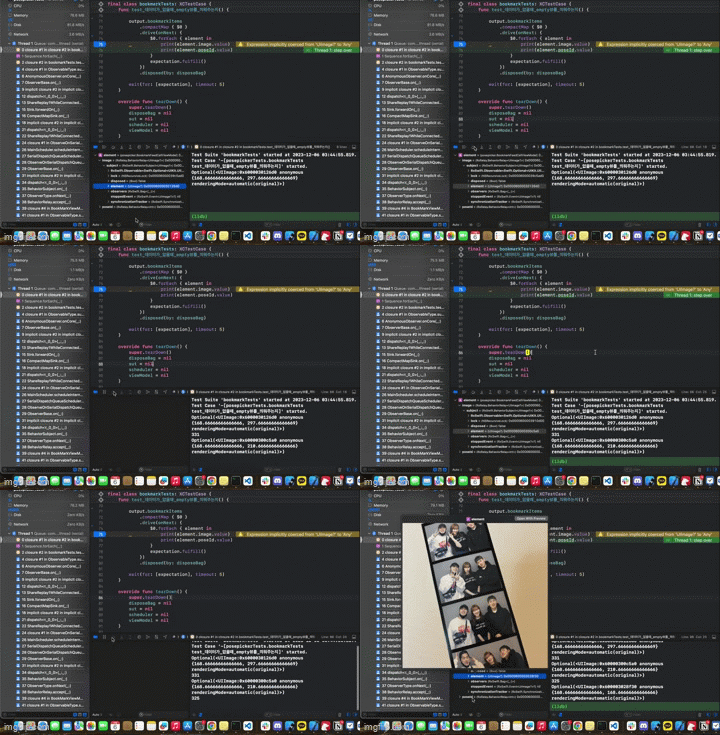
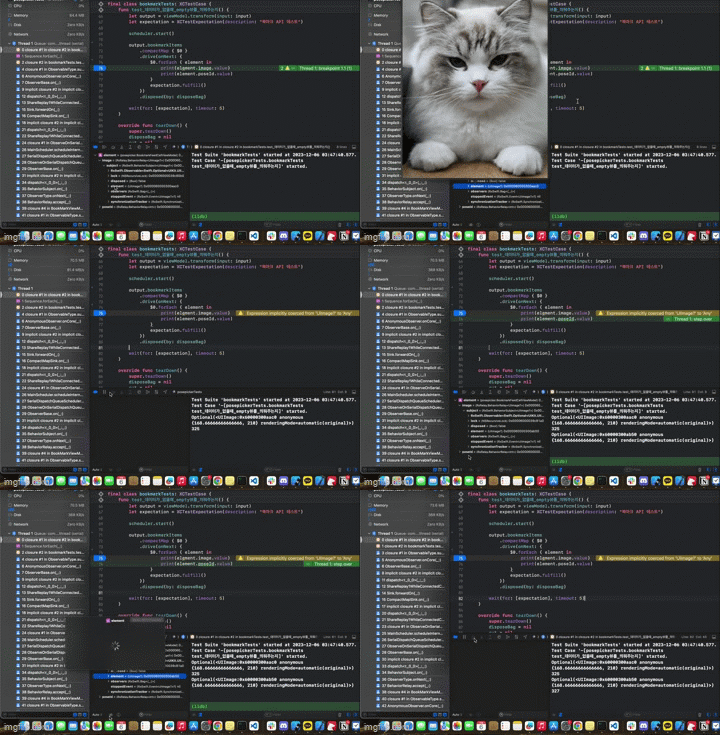
그렇다면 목업 프로토콜로 이미지 다운로드가 진행된 것을 어떻게 검증하는가? 브레이크 포인트 설정을 통해 현재 참조하고 있는 UIImage 객체를 직접 미리볼 수 있는 기능을 xcode에서 제공한다. 목업 프로토콜이 생성된 경우와 그렇지 않은 경우에 대해 xcode에서 결과가 어떻게 달라지는지 확인해보자.

위 화면은 목업 프로토콜을 거쳐 얻어온 JSON 객체에서 각 이미지 URL에 접근 후 다운로드한 이미지들을 xcode 브레이크 포인트 설정을 통해 프리뷰하는 모습이다. 프리뷰하는 과정에서 이미지가 계속 달라지는 것을 볼 수 있는데, 이는 각 JSON으로부터 추출한 이미지 URL마다 새로 이미지들을 다운로드 하고 있기 때문이다.

위 화면을 다시 보면, 고양이 사진으로 일관되게 프리뷰에 표시되는 것을 볼 수 있는데 이는 ImageDownloader 객체에까지 목업 프로토콜을 적용했기 때문이다. 로컬에 저장되어 있는 이미지를 가짜 응답으로 내보내는 형태로 동작하기에 고양이 사진으로 일관되게 처리되는 것이다.
목업 프로토콜이기에 일관되게 처리되었다기보다, 다시 목업 프로토콜 코드를 살펴보면 MockDTOType 열거형 케이스에 고양이 이미지에 대한 열거형 하나만 정의되어 있기 때문에 이런 것이다.
enum MockDTOType {
    case empty
    case cacheImage

    var fileName: String {
        switch self {
        case .empty: return ""
        case .cacheImage: return "image.jpeg" // 고양이 이미지
        }
    }
}
이미지 목업 프로토콜을 적용하게 되면 xcode 개발자 도구에서 네트워크 링크 컨디셔너에 100% Loss 옵션을 걸어두고 테스트 하더라도 로컬에서 가짜 응답으로 내보내기 때문에 테스트가 정상적으로 이루어지게 된다. 테스트 환경이 네트워크 환경으로부터 완전히 독립적으로 구성된 것이다.